Can I use nail art pens to create a gradient effect on nails?
Leave a message

Hey there, nail art enthusiasts! As a supplier of nail art pens, I often get asked a ton of questions about what these little tools can and can't do. One question that pops up quite a bit is, "Can I use nail art pens to create a gradient effect on nails?" Well, you betcha! In this blog, I'm gonna break it all down for you and show you just how awesome nail art pens can be for achieving that beautiful gradient look.
First things first, let's talk about what a gradient effect is. A gradient on nails is when you blend two or more colors together in a smooth, seamless way, so it looks like the colors are gradually changing from one to the other. It gives your nails this super cool, ombre - like appearance that's really trendy right now. And guess what? Nail art pens are perfect for pulling this off.
One of the main reasons nail art pens are great for gradients is their precision. When you're using a nail art pen, you have a lot of control over where the color goes. Unlike some other nail art methods, like sponging on polish, a pen lets you apply the color exactly where you want it. You can start with a thin line of one color and then carefully add another color next to it, gradually blending them together.
Let's get into the nitty - gritty of how to create a gradient using nail art pens. You'll need a few things: your nail art pens in the colors you want to use, a base coat, a top coat, and a nail file or buffer to prep your nails.

Start by prepping your nails. Use the nail file to shape your nails and the buffer to smooth out the surface. Then, apply a base coat. This not only protects your nails but also gives the nail art pen colors something to stick to.
Once the base coat is dry, it's time to start with the gradient. Pick two or more colors that you think will look good together. For example, you could go with a light pink and a dark pink, or a pastel blue and a bright blue.
Take your first color and draw a thin line along the bottom of your nail. Then, take your second color and draw a thin line right next to it, just above the first line. You don't have to worry about getting the colors perfectly separate at this point. The key is to start building up the layers.
Now, here comes the blending part. You can use the tip of the pen to gently blend the two colors together. You can do this by going back and forth between the two colors, slowly mixing them on the nail. It might take a few tries to get the hang of it, but with a bit of practice, you'll be able to create a smooth gradient.
Keep adding more layers of color if you want a more complex gradient. You can add a third or even a fourth color, building up the effect. Just make sure to blend each new color with the ones next to it.
Once you're happy with your gradient, let it dry for a few minutes. Then, apply a top coat. This will seal in the colors and give your nails a nice, shiny finish.
As a nail art pen supplier, I know there are a lot of different types of nail art pens out there. And when it comes to creating gradients, some pens might work better than others. That's why I want to tell you about some of the amazing nail art pens we offer.
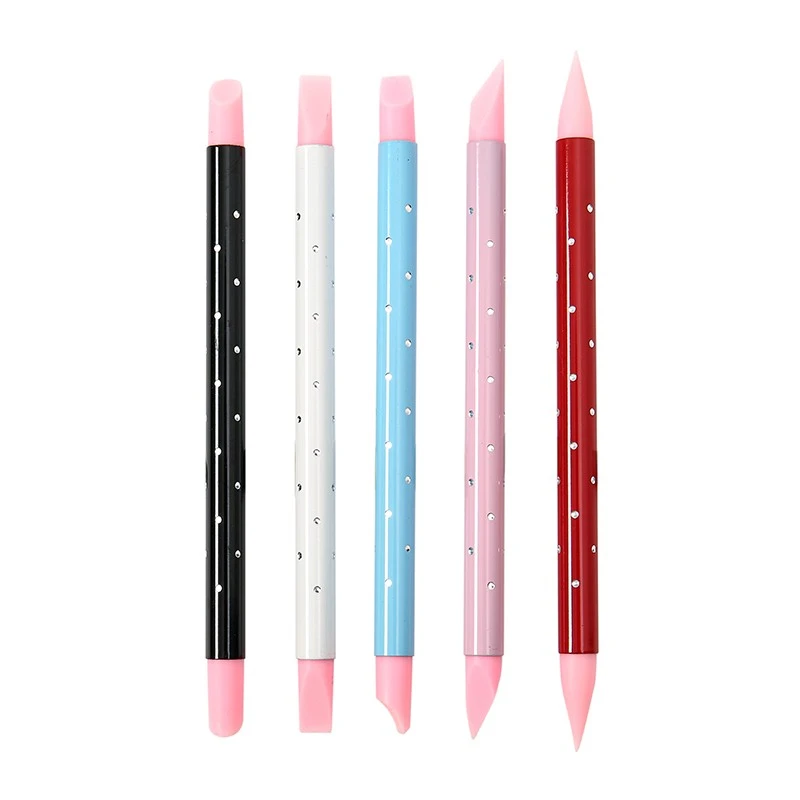
We have Eco Friendly Silicone Nail Pens. These pens are not only great for the environment but also super easy to use. The silicone tip allows for smooth application of the color, which is perfect for creating that seamless gradient look. They're also non - toxic, so you don't have to worry about any harmful chemicals getting on your nails.
If you're on a budget, our Affordable Silicone Nail Pens are a great option. You don't have to sacrifice quality for price. These pens still give you great color payoff and are easy to control, making them ideal for gradient nail art.
And for those of you who want your gradient to last, check out our Waterproof Silicone Nail Pens. These pens are designed to withstand water, so your gradient won't smudge or fade, even if you wash your hands a lot or do some water - based activities.
Another thing to keep in mind is that you can experiment with different techniques when using nail art pens for gradients. For example, you can try creating a reverse gradient, where the darker color is at the tip of the nail and the lighter color is at the base. Or you can add some glitter or metallic accents to your gradient for an extra - special look.
You can also use nail art pens to create a gradient on just part of your nail. Maybe you want to do a gradient on the tip of your nail and leave the rest of it a solid color. The possibilities are endless!
One of the great things about using nail art pens for gradients is that it's a relatively quick and easy way to change up your nail look. You don't have to spend hours in a nail salon to get a beautiful gradient. You can do it at home in your own time, and it's a lot of fun!
If you're still not sure about using nail art pens for gradients, I encourage you to give it a try. Start with simple color combinations and work your way up to more complex ones. With a little practice, you'll be creating amazing gradient nail art in no time.
As a supplier, I'm always here to help. If you have any questions about our nail art pens or need some advice on creating gradients, don't hesitate to reach out. Whether you're a professional nail artist or just someone who loves doing their own nails at home, our nail art pens can help you achieve the look you want.
So, if you're interested in purchasing our nail art pens for your gradient nail art projects, get in touch with us. We can talk about bulk orders, pricing, and any other details you might need. Let's work together to make your nails look amazing!
References:
- Personal experience as a nail art pen supplier
- General knowledge of nail art techniques and trends