How to paint a distressed look with acrylic paint on wood?
Leave a message

Achieving a distressed look on wood using acrylic paint is a popular technique that can add character and charm to any wooden piece. Whether you're working on furniture, decorative items, or even wooden signs, this method can transform ordinary wood into a unique and rustic masterpiece. As a supplier of high-quality acrylic paint for wood, I'm excited to share with you a step-by-step guide on how to paint a distressed look with acrylic paint on wood.
Materials You'll Need
Before you start, gather the following materials:
- Acrylic Paint: Choose a variety of colors that complement your desired distressed look. You'll typically need a base color and one or more topcoat colors.
- Wood Surface: Select a clean and smooth wooden surface. Sand it lightly to remove any rough spots or debris.
- Paintbrushes: Have a variety of paintbrushes on hand, including small detail brushes and larger flat brushes for covering larger areas.
- Sandpaper: Different grits of sandpaper, such as 120 - 220 grit, will be used for sanding and distressing.
- Stain or Glaze (Optional): These can be used to enhance the distressed effect and add depth to the finish.
- Clear Coat (Optional): A clear coat can protect the painted surface and give it a more durable finish.
Step 1: Prepare the Wood
Start by preparing the wooden surface. If the wood has any existing finish, you may need to sand it down to ensure good adhesion of the acrylic paint. Use a medium-grit sandpaper (around 120 - 150 grit) to sand the surface evenly. Wipe away any dust with a clean cloth.
Step 2: Apply the Base Coat
Once the wood is prepared, apply the base coat of acrylic paint. This will serve as the foundation for the distressed look. Use a large flat brush to apply the paint evenly, following the grain of the wood. Let the base coat dry completely according to the paint manufacturer's instructions. This may take a few hours or overnight, depending on the paint and environmental conditions.
Step 3: Apply the Topcoat
After the base coat is dry, it's time to apply the topcoat. Choose a color that contrasts with the base coat to create a more noticeable distressed effect. You can apply the topcoat in the same way as the base coat, using a large brush. However, for a more uneven and rustic look, you can also use a dry-brush technique. Dip a dry brush lightly into the paint and then wipe off most of the excess on a paper towel. Then, brush the paint onto the wood in a light, uneven manner, focusing on the edges and raised areas.
Step 4: Distress the Surface
Once the topcoat is dry, it's time to distress the surface to reveal the base coat underneath. There are several ways to do this:
- Sandpaper: Use a fine-grit sandpaper (around 220 grit) to sand the edges, corners, and areas where natural wear and tear would occur. Apply light pressure and sand in a circular or random motion. This will gradually reveal the base coat and create a weathered look.
- Chipping: You can also create a chipping effect by using a putty knife or a small tool to gently scrape off small pieces of the topcoat. Focus on areas where the paint would naturally chip, such as along the edges and on raised surfaces.
- Staining or Glazing: To enhance the distressed effect, you can apply a stain or glaze over the painted surface. Choose a color that complements the existing colors and apply it with a brush or a rag. Wipe off the excess stain or glaze with a clean cloth to create a more subtle and aged look.
Step 5: Seal the Finish
After you're satisfied with the distressed look, you can seal the finish to protect the painted surface. Apply a clear coat of acrylic sealer with a brush or a spray gun. Follow the manufacturer's instructions for drying time and application method. A clear coat will not only protect the paint but also give it a more professional and durable finish.
Tips and Tricks
- Experiment with Colors: Don't be afraid to experiment with different color combinations to achieve the desired distressed look. You can try using complementary colors, analogous colors, or even contrasting colors for a more dramatic effect.
- Layer Your Paints: For a more complex and realistic distressed look, you can layer multiple colors of paint. Apply each layer and let it dry before distressing and adding the next layer.
- Use Different Distressing Techniques: Combine different distressing techniques, such as sanding, chipping, and staining, to create a more unique and authentic look.
- Practice on a Scrap Piece: If you're new to distressing with acrylic paint, it's a good idea to practice on a scrap piece of wood first. This will allow you to experiment with different techniques and colors without ruining your final project.
Related Products
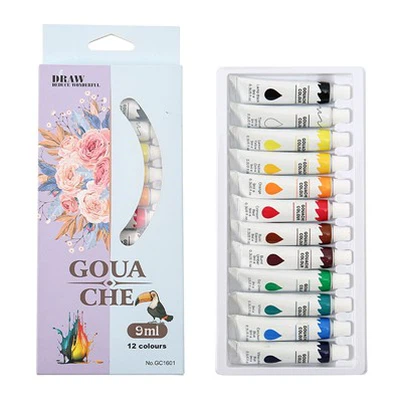
If you're interested in exploring other types of paint for your wood projects, we also offer Watercolor Paint and Gouache Color Paint. These paints can be used in combination with acrylic paint or on their own to create a variety of effects. You can also find some inspiration for your next project on our Watercolor Paint Ideas page.


Contact Us for Procurement
As a leading supplier of acrylic paint for wood, we offer a wide range of high-quality products at competitive prices. Our paints are formulated to provide excellent coverage, durability, and color retention. Whether you're a professional artist, a DIY enthusiast, or a furniture manufacturer, we can provide you with the paint you need for your projects.
If you're interested in purchasing our acrylic paint for wood or have any questions about our products, please feel free to contact us. We're always happy to assist you with your procurement needs and provide you with expert advice and support.
References
- "Acrylic Painting Techniques" by Artist's Network
- "Wood Finishing for Beginners" by Fine Woodworking Magazine
- "Distressing Furniture: A Step-by-Step Guide" by DIY Network